
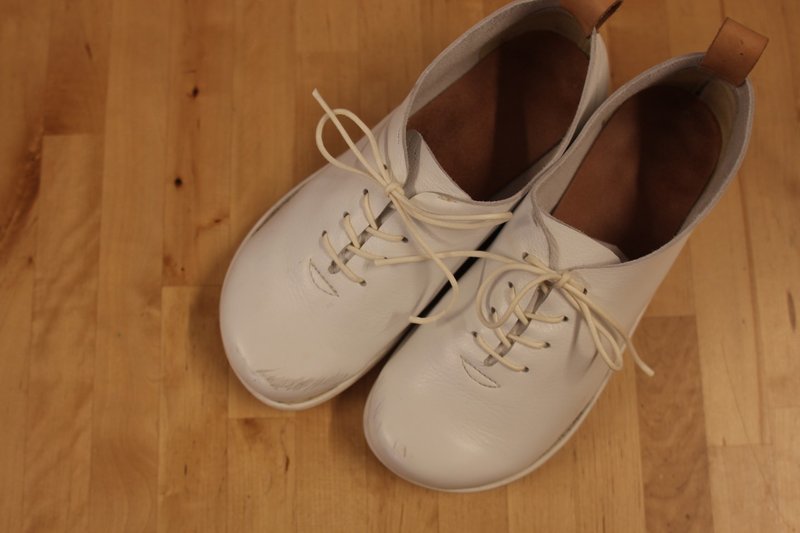
Talk from the people behind blueover #01 Work talk
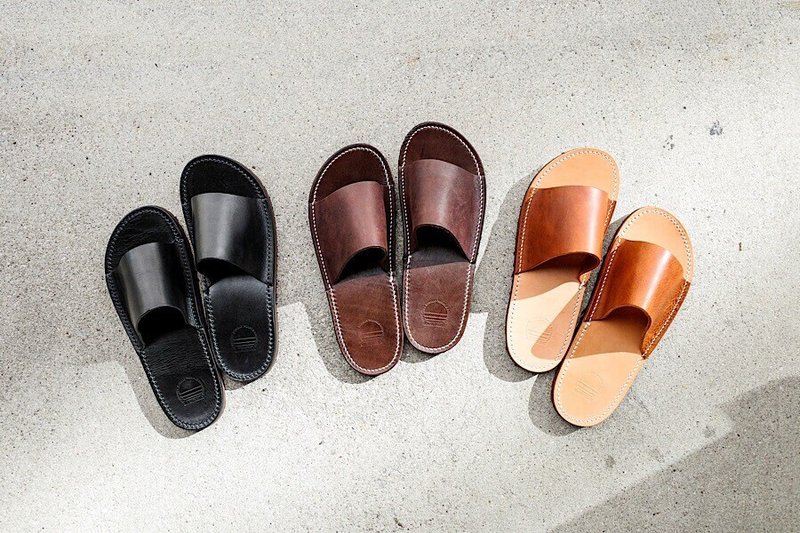
ZUCCOZUCCO
 |
ZUCCO Blueover's sample craftsman. He creates shoes by hand, from making patterns to sewing and shoemaking. He also arranges for factories and materials. @blueover_zucco |
This series is a compilation of several posts I wrote on Note in an attempt to explain my work - that is, making shoes - in as easy-to-understand a way as possible.
<About my job>
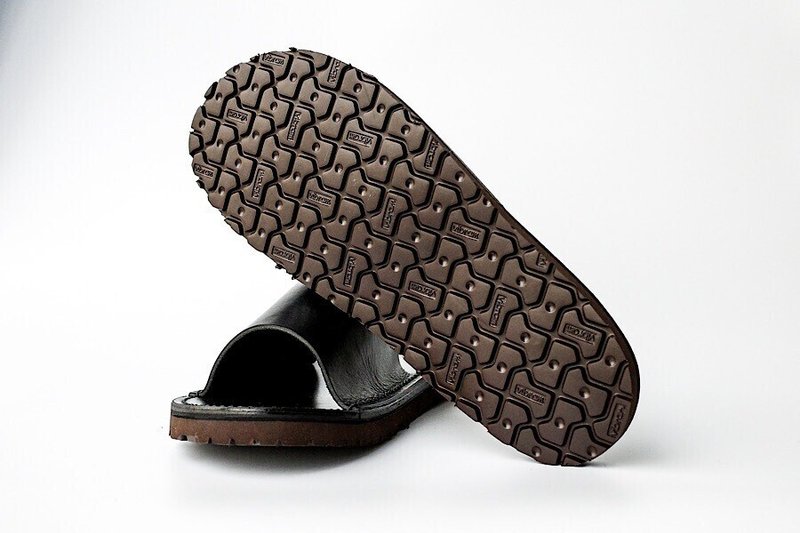
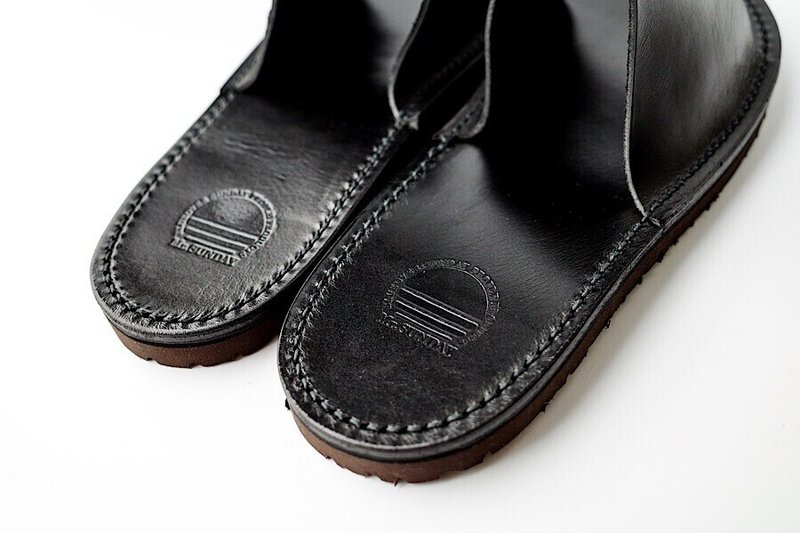
Although I make shoes, in my case, I don't make shoes every day. My job is to "put the design on a wooden shoe tree, create the pattern, prepare and arrange for mass production, and turn it into a product." Both the women's shoe brand AROA and the sneaker brand blueover don't release a lot of new products every year, but rather develop new models with the intention of making them staples. It takes a considerable amount of time to create new models and custom-made models. After creating a pattern based on the design, I cut, sew, tack, and attach the soles by hand to create sample shoes that can be tried on.
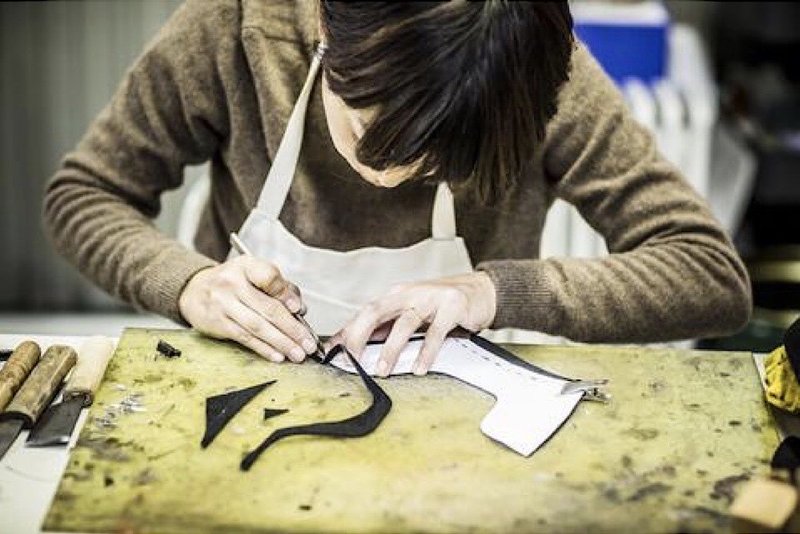
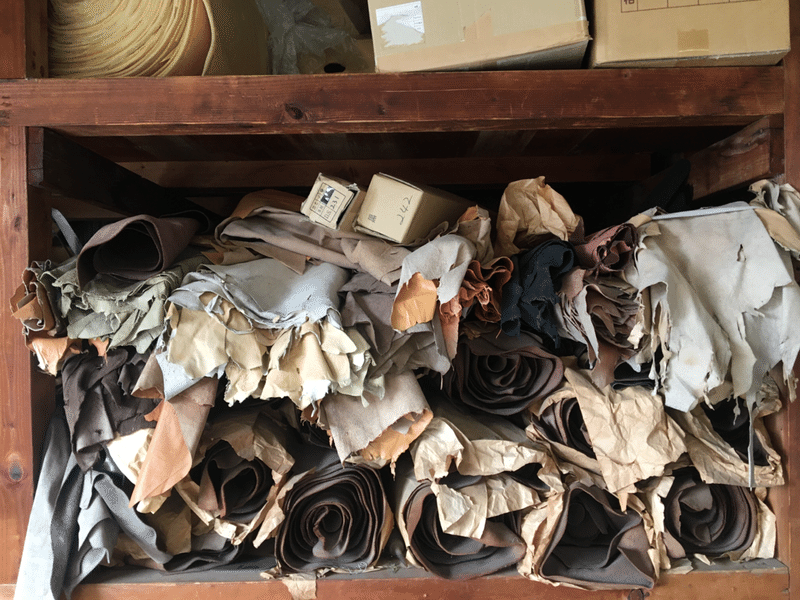
After repeated try-ons and revisions, once the final sample is complete, we discuss with the factory to fine-tune the pattern and arrange for materials for mass production. Shoe manufacturing involves many steps and is a division of labor. There are different companies for each of the cutting dies, wooden molds, auxiliary materials, insoles, midsole, sole (outsole), laces, and boxes needed for cutting. And there are craftsmen for each step.
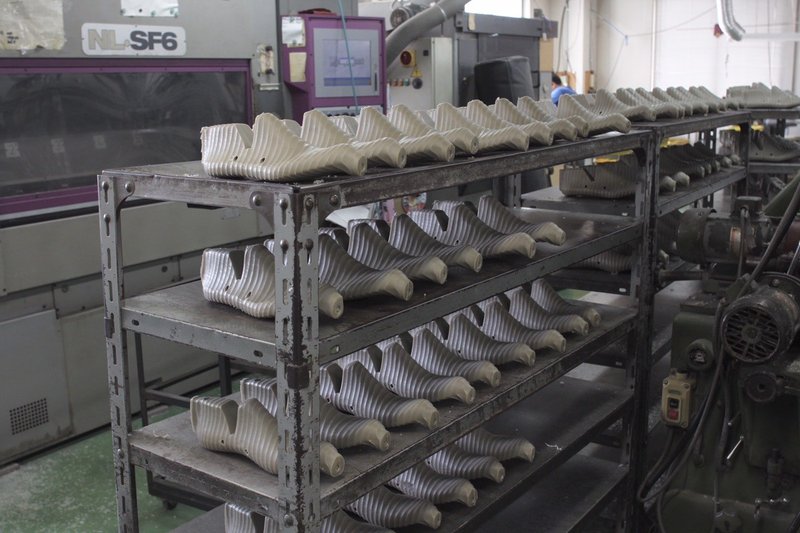
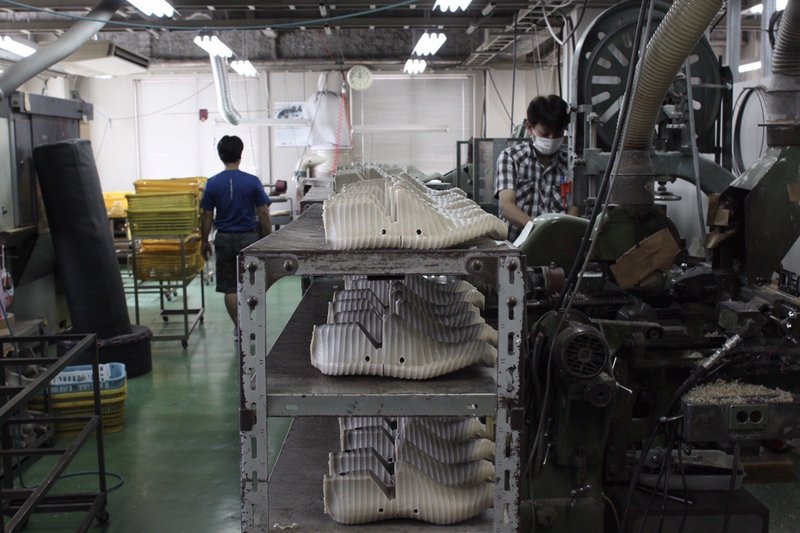
Cutting → Sewing → Tightening and bottoming
For example, even for the single process of shoring and soling, we ask several factories to help us. There are factories that specialize in sneakers, factories that specialize in dress shoes, factories that specialize in motorcycle boots, and factories that specialize in women's pumps. We decide which factories to ask to mass-produce by checking their areas of expertise. Our shoes are made by bringing together factories and material stores in shoe complexes all over Japan.
Working in the shoe industry has allowed me to meet many factories and work with them to make shoes. Both AROA and blueover exist thanks to these connections. The shoes I've been involved in are passed on to many people, become shoes, and then reach the hands of customers. There are many things that come along, but I still love my job.
"There are times when 'trying it' will change your life.'"
About 10 years ago, when I was in my late twenties, I made and sold shoes and repaired shoes and bags to make a living.
I also set up stalls at events and made original shoes for second-hand clothing stores. However, as an unknown, I didn't always sell shoes, and I had to work part-time jobs late at night or early in the morning to make ends meet. After a few years, it was all I could do to keep my spirits up.
Then, I came across Blueover on the internet. It was a name I had never heard of in the small shoe industry, and it was a brand from Osaka. I was intrigued.
Meanwhile, I was desperate for work and wanted to connect with a variety of people. While researching cross-industry networking events that were popular at the time, I came across the name Blueover. Since people from Blueover were also attending, I decided to show up dressed quite strangely, in a tattered sweatshirt and shorts.
There I connected with the members of blueover, got a job, and now I am working as one of the members.
I'm convinced that taking that step at that time changed my life drastically. My personal life and work life have changed by almost 180 degrees.
Ten years have passed, and I'm now in my late 30s, but just like back then, I tell myself, "If I give it a try, my life will change."
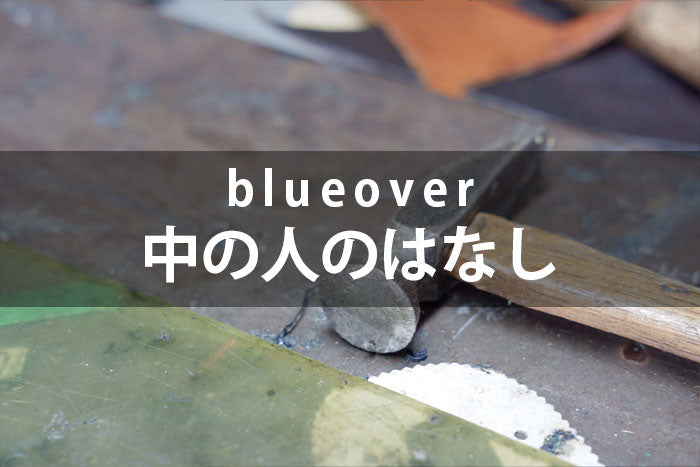
<Sewing machine, papermaking machine and memories of that day>
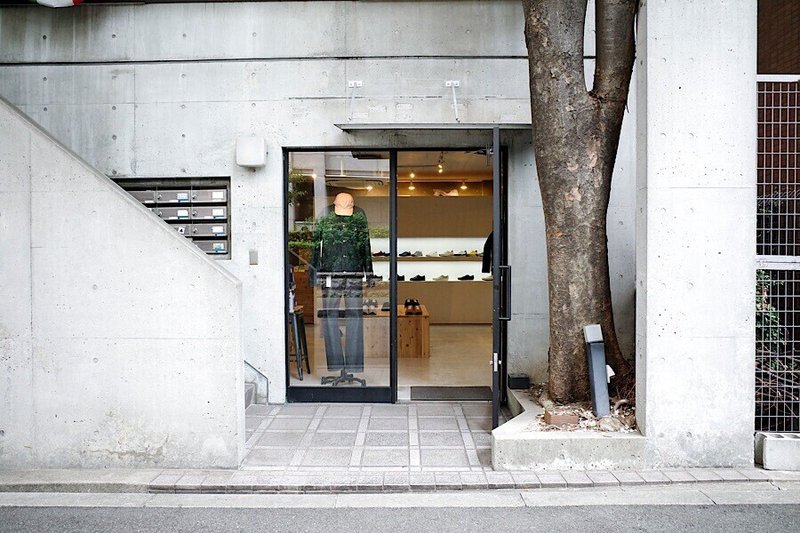
Blueover's flagship store, "struct," located near Utsubo Park in Osaka City, naturally stocks a wide selection of Blueover shoes.
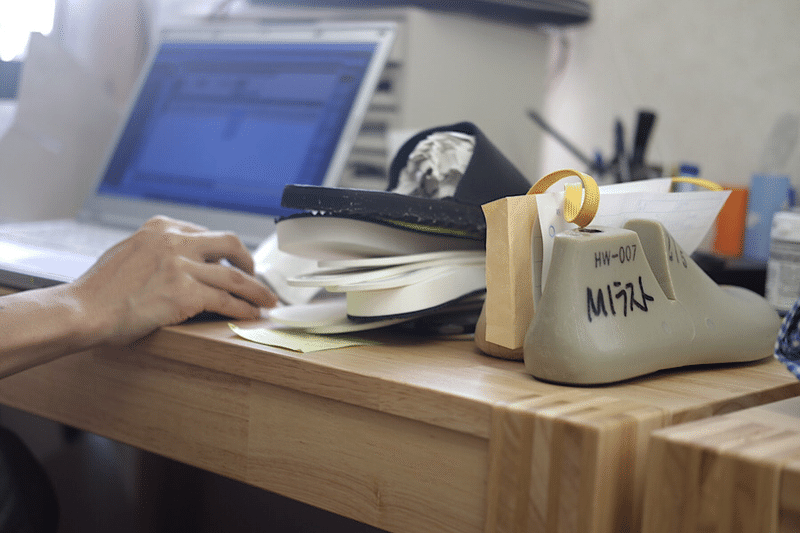
At the back of the store, I have my workshop, which is equipped with a workbench, sewing machine, and papermaking machine. In this workshop, I sew and attach soles to make samples. I create and modify patterns and cut the leather in a different location, so I am often not there. If you happen to see me when you visit, please feel free to say hello.

Sewing machine and papermaking machine
From the front of the photo, there are a papermaking machine, a sewing machine, and a workbench.
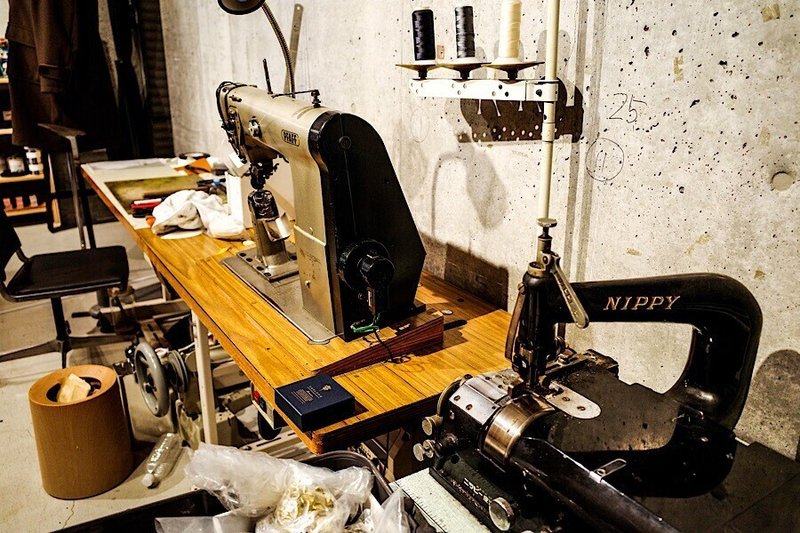
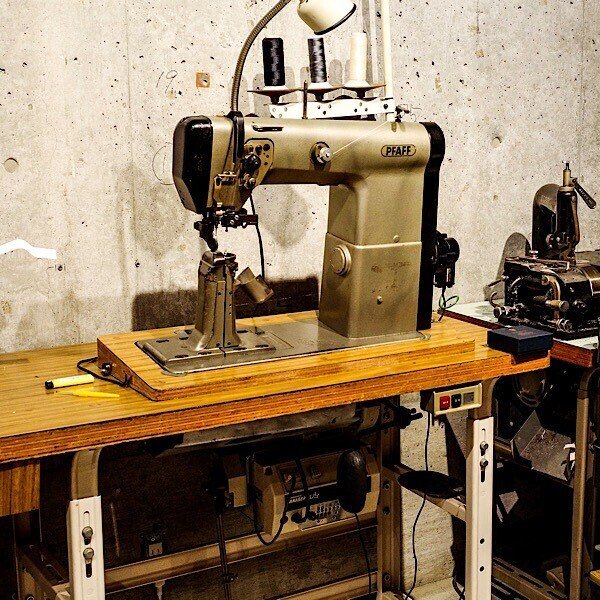
The sewing machine is a shoemaking machine called a post sewing machine. The skiving machine is a machine that skives the leather thinly. I will explain the machine in detail in another article.
I wanted to be a shoemaker
When I was a university student, I wanted to work in shoemaking, but I was studying genetics in the Faculty of Agriculture.
Since I had gone to university, I couldn't bring myself to tell my parents that I wanted to go to shoe school, and I didn't have any money, so I looked for a job where I could plan shoes, but they only accepted applicants with an art background, so I ended up becoming a shoe salesperson. While working as a salesperson, I spent my days off learning shoemaking from craftsmen, and continued this for a year and a half, but I wanted to be more involved in shoemaking, so I quit my job. I was probably 23 or 24 years old.
After I quit my job, I spent more time learning how to make shoes. At the same time, I was living away from my hometown, so I also worked part-time.
While working part-time jobs late at night and early in the morning, he learned how to make shoes during the day.
I did a variety of jobs, including working at an internet cafe, stocking shelves at a supermarket, sorting parcels, in a food factory, and serving customers at a bar.
However, juggling both work and family like that resulted in a lack of sleep and I couldn't continue for long. I also had no money, as my rent and utility bills almost completely wiped out my earnings from my part-time job.
To bridge the gap between who I wanted to be and who I was.
There was a big gap between the image of myself I had as a university student and the real me, and it was hard at times. But then I found a sewing machine and a papermaking machine.
At that time, there were quite a lot of people who wanted to become shoemakers, so sewing machines and papermaking machines were in short supply.
I was on the lookout for something I wanted, and then I heard about it.
There were other people who wanted them too, but their passion was contagious, so they decided to give them to me. I think the sewing machine was about 220,000 yen. The papermaking machine was about 70,000 yen.
Most papermaking machines cost around 120,000 yen, so this one was in good condition and was a bargain, so I asked my sister to lend me some money and I was able to buy the sewing machine and papermaking machine.
*The workbench was given to me by the craftsman when I bought the sewing machine. It would cost money to dispose of it.
I think you can get it cheaper now. I paid my sister back a little bit every month (thanks to her). Having a sewing machine and papermaking machine at home has boosted my motivation and increased the range of work I can take on. Even when I was working at a repair shop, having my own sewing machine made me much more efficient.
And now
Yesterday, I received a pair of shoes as a gift from my former shoemaking teacher, who gave me a gift to celebrate the birth of my child. He now lives in Tokushima Prefecture, but we remain good friends.
I caused them a lot of trouble, but I'm really grateful that they were so friendly with me. At that time, I bought a sewing machine and a papermaking machine, took on personal work, and made and sold my own shoes, so maybe that's why they recognized me a little.
Part-time jobs unrelated to shoemaking are just for money, but having a sewing machine and a papermaking machine means I can get work related to shoes and bags.

The shoes I received as a gift brought back many memories. There was a time when he invited me to his house even though I had no money and treated me to saury.
When you have something you want to become, or something you want to do, if you force yourself to do it, the situation may change.
What I want to be when I grow up
I have children. When I ask them, "What do you want to be when you grow up?", they come up with all sorts of dreams, like "I want to be an elephant!", "A soccer player!", "A ninja!", "A sushi chef!", or "A pet shop owner!"
As a parent, I want my child to find something he can devote himself to one day, and I want to support him, so his dreams for the future are sometimes a topic of conversation at the dinner table. Recently, I've been asked the same question: "What do you want to be when you grow up, Cha-chan?"
Suddenly asked
"picture!?"
I was at a loss for words.
I'm a bit older now, I thought, but my kids made me realize that it's okay to be whatever you want to be, no matter how old you are. When I was little, my dreams were girly things like a piano teacher, a kindergarten teacher, or an ice cream shop owner.
When I was in college, I was fascinated by leather and wanted to be involved in shoemaking, so I decided to go into the world of shoes. I ended up at blueover through connections with many people, and when I think about it, my dream at the time came true. From then on, I didn't even think about it as a dream.
When I was a university student, my dreams were quite self-centered.
I'm thinking about what I want to do now. I feel uncomfortable making things just to satisfy my own desires, so I'm continuing to make blueover in cooperation with many factories in Japan.
Carrying on traditional industries is also very important to us.

However, recently I have been thinking a lot about what I can do for the future. I want to take action for tomorrow, for three years from now, for five years from now, for the future of our children. What can I do through myself and my work? We have started to take action.
I can't do anything big, but I'll keep moving forward with the desire to make things better.
<Shoe production story>
Let me talk a little about shoe production.
The shoe industry is a division of labor. This is common knowledge for anyone working in shoe-related jobs, and many of you may have heard of it. The division of labor is extremely detailed.
First of all, there are the leather shop, the lining shop, the insole shop, the sole material (rubber) shop, the last shop, the sole processing shop, the die shop, the cutter, the seam shop, the lining shop, the lace shop, the glue shop, the supply factory, etc. There are also cases where fabric is used, in which case a fabric shop is also needed.
I think that many manufacturers purchase their materials from wholesalers that stock and sell a variety of materials.
We do a relatively large amount of direct business. When we do business directly, we can communicate with the factory and they will tell us things they don't understand or want to know. We can get hints for the issues we are facing, which will bring us closer to our goals.
(For example, when sewing the soles using the McKay method, the insole manufacturer suggested several strong insole materials.)
Before I got so deeply involved in the shoemaking industry, I had no idea that the division of labor was so finely divided.
When I decided to make shoes, the older craftsmen and my seniors often told me, "Don't make shoes, why not make bags instead?" Shoe production requires too many people to work together, which takes a lot of time and money.
Also, different cutters are needed for each size, which is very costly.Since bags do not come in a range of sizes, the initial cost is lower than for shoes.
But I still keep wearing them, and I often think of it as being like a marathon. 5km, 10km, 20km... I keep running even after passing various points, aiming for the finish line.
And then the shoes are finished. When the shoes that we have worked so hard on turn out to be better than we could have ever imagined, it gives us an indescribable feeling of joy.
<Shoe production flow>
Yesterday, we finally gathered all the materials for the Mikey:suede model, and arranged for all the materials to be sent to the factory where the soles are attached. This model is made of pigskin suede, which is different from the standard Mikey model.
Here is a brief summary of the process from when we receive your order until the shoes are completed.
① Summarize the number of pairs ordered
We received the order at the end of April and finalized the number of pairs in May. It may seem obvious, but it would be a disaster if we ordered the wrong color or size. Materials such as insoles and soles also vary in size, so we had to be careful not to make any mistakes. We repeatedly compared the order form to make sure the number of pairs we had finalized matched.
② Order each material
We will order each material for the total quantity.
- The materials you need are…
- Leather (pigskin suede in this model)
- Pig lining
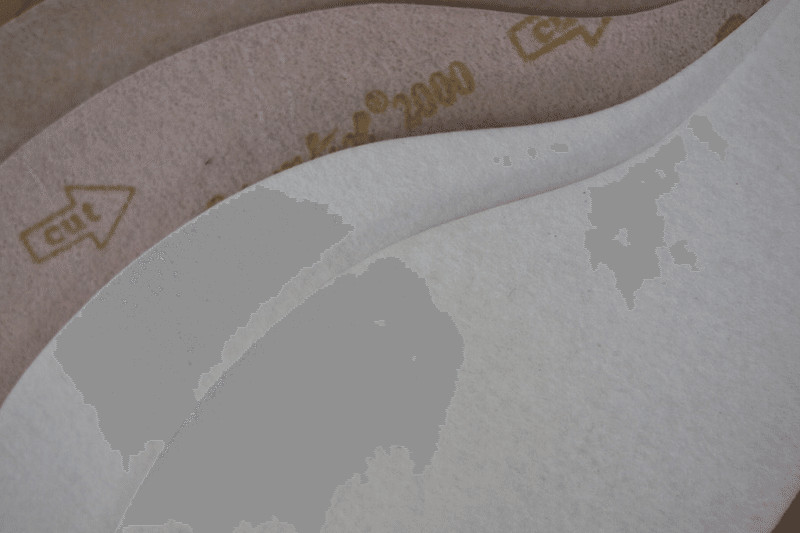
- insole
- Insole
- Outsole
- string
- Woven label
- Toecap
- counter
- box
Or something like that. Since each material supplier is different, I created an order form for each. I also gave the order forms to the sewing factory and the sole factory in advance to confirm their capacity. Here too, just like in ①, I checked the numbers over and over again to make sure they were correct.
③ Send the upper material to the sewing factory
It takes about one and a half to two months for the pigskin suede leather to be completed. This time it was delivered in July. I ordered it in May, so it took two months. Then the pigskin suede is lined.
Pig leather is known for its lightness and durability, but the thickness of the leather itself is thinner than cowhide. Since the standard Mikey uses thick velour , the leather looks softer in comparison. Considering this, we applied shoe reinforcement material to the entire leather. Therefore, after receiving the leather, we had it relined.
We then sent the outer leather, lining, woven label, toe cap, and counter to the sewing factory.
④ Materials are gathered
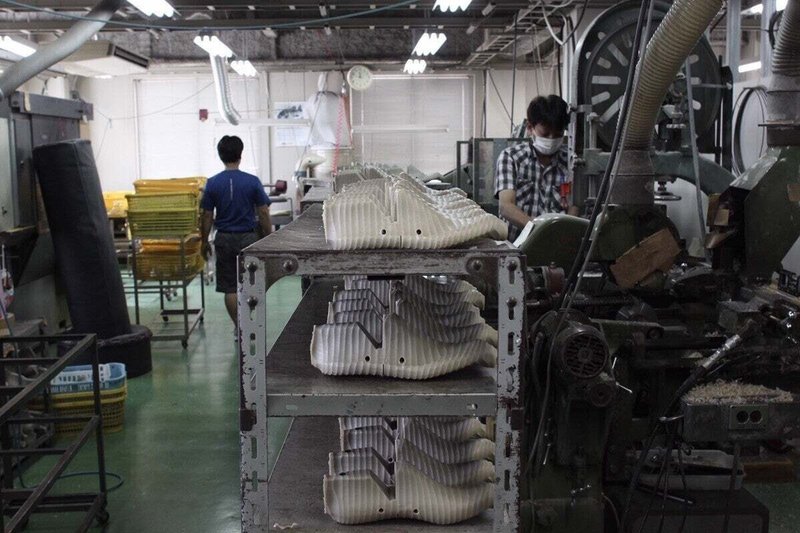
Then, the materials that were ordered in May started to arrive. The uppers were also sewn, and everything was ready the day before yesterday.
⑤ Send all materials to the sole factory
Yesterday we made great progress in preparing the bottom.
Mikey Suede Grey Upper

mikey suede camel upper
mikey suede navy upper
Woven tongue label
Insole
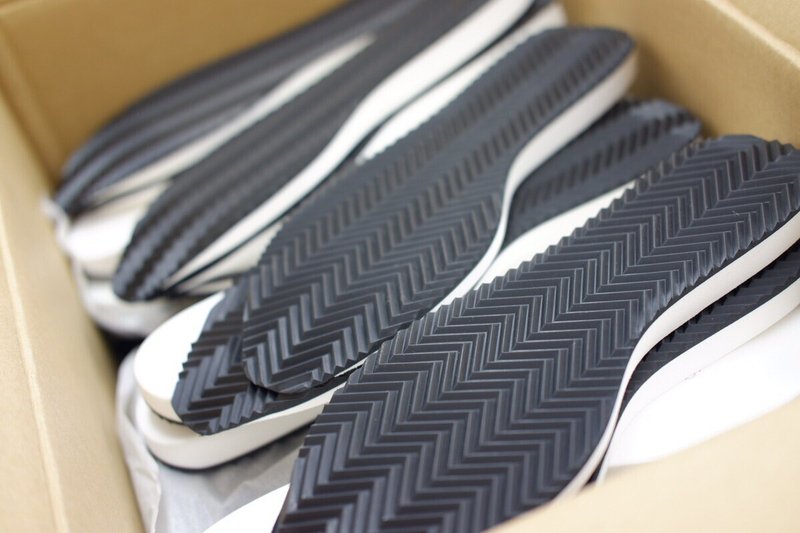
Outsole
I also sent some laces and stickers to put on shoe boxes.
Afterword
It's been a few months since we finalized the numbers in May, and the products will be arriving soon. We still need to be on our toes because something might happen until the shoes arrive, but now that we've sent them to the sole factory, it's the final stage, so I'm a little relieved. I don't think we'll have many opportunities to see the shoe uppers.
What do you think? I like them haha. They were just uppers, but when they arrived as shoes, they felt like living creatures with souls, and it always gave me a mysterious feeling. I can't wait for them to arrive.
And for those of you who have been waiting, it will be completed soon, so please wait a little longer.
<Consult with a wood pattern maker about wooden patterns>
Shoe lasts affect the shape and comfort of shoes. When you want to make shoes, you usually need a shoe last. There are used shoe lasts for sale online, but sometimes they don't have the shape you want. How can you make your own original shoe last?
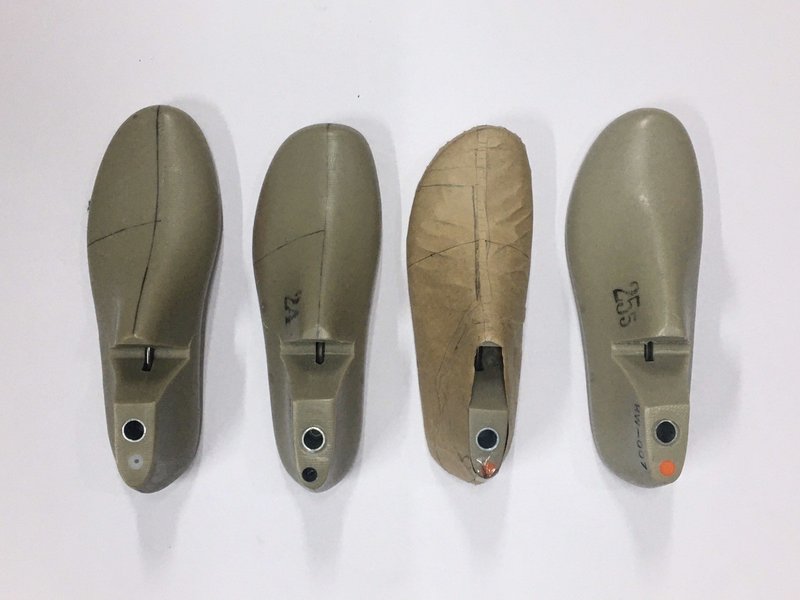
When making wooden molds, it is best to consult a "mold maker."
Let's decide what kind of shoes we want to make.
Are the shoes you're looking for men's or women's? Are the sizes in 5mm increments or 1cm increments? What size shoe do you want? Are they sneakers or leather shoes? Are they round or narrow shoes?
If you have a shoe or shoe last that you think is "just like this," it's a good idea to have them take a look at it.
Based on the consultation, the wooden mold maker carves the wood by hand.
The wood is carved based on your requests and consultations. This is true craftsmanship.
We carve wood, as shown in the photo above.
Using the completed wooden last, we create a sample that can be tried on.
This is something I do myself. I try making shoes based on the wooden shoe lasts that the shoe maker has carved.
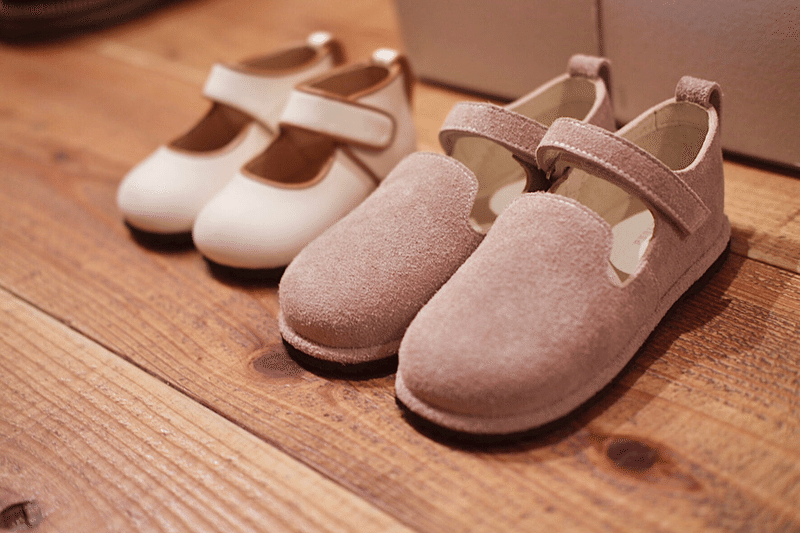
Below is a photo of the AROA sample. The suspension has been made smaller since the sample.
Try on the sample and adjust the size and shape
We then consult with the wooden mold maker and make adjustments. This process may be repeated several times.
In the case of AROA, there was a sole (the sole of a nurse sandal) that I wanted to use as the base, so I created a wooden last based on that sole. Normally, sole design starts with a wooden last.
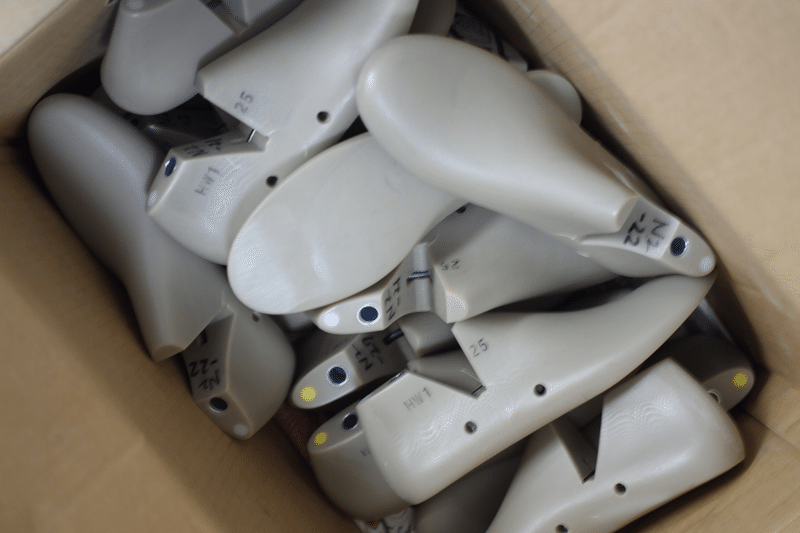
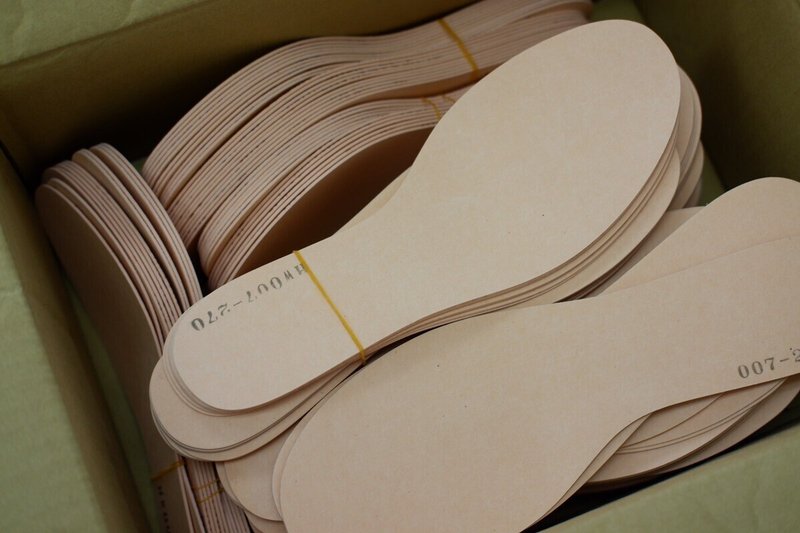
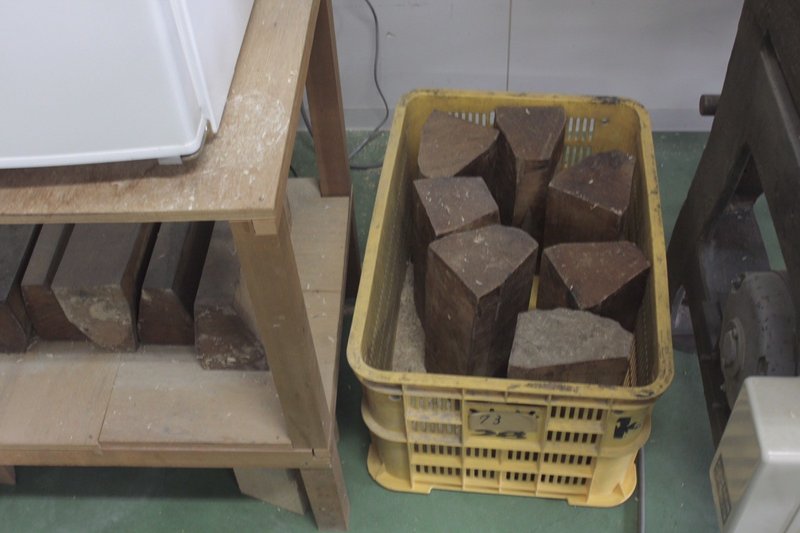
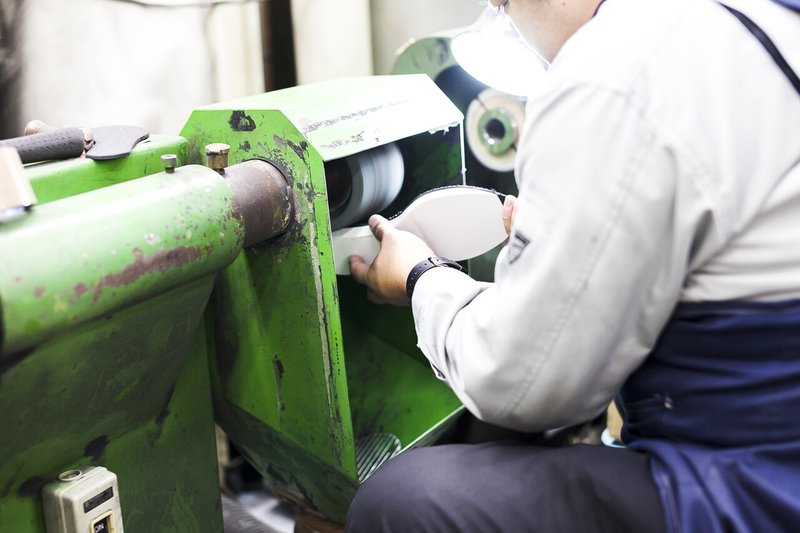
Mass production of wooden molds
Once the final shape is decided, plastic molds are mass-produced using the carved wooden mold. These are called plastic molds. You might think that wooden molds look cooler. However, wood changes size, cracks, and rots due to moisture in the air. Plastic molds hardly change size and can be used for a long time.
Another feature of plastic molds is that they make it easy to remove the mold from the shoes once they are finished.
The rugged feel and roughly carved plastic molds are cool. I love the industrial feel. To mass-produce shoes, several identical wooden lasts of the same size are required. In the case of AROA, there are three sizes, 12 of each wooden last.

Creating a plastic mold in Japan costs about 5,000 to 6,000 yen, and of course, sample fees are also required.
If you're interested in how much it costs, try calculating it! It costs quite a bit!!
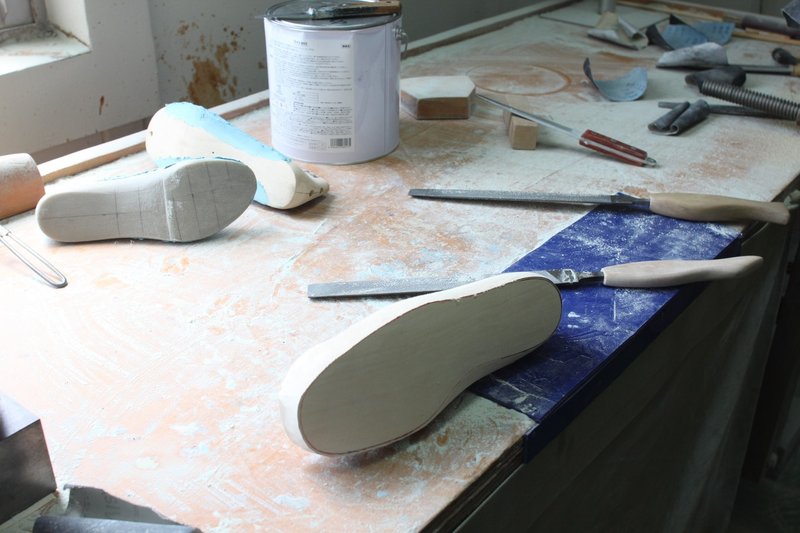
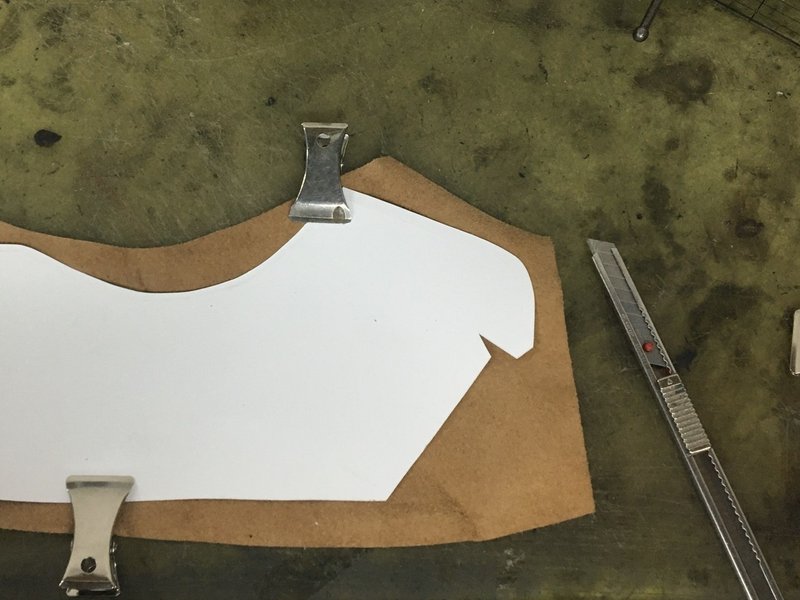
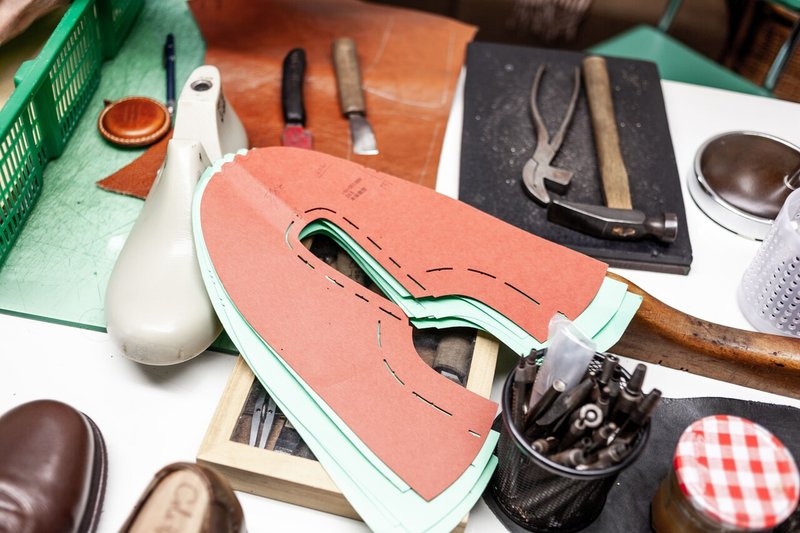
<Making the upper>
It's been raining since this morning.
We are assembling the upper.
After prototyping and fitting
The final pattern is made based on the completed pattern.

The final adjusted pattern. After cutting and sewing, the final sample is made. In preparation for mass production, I confirm any necessary corrections with the factory, and then we begin creating the cutting dies, etc. Sharing specifications is also important.
Create a final sample using the leather you will use for mass production
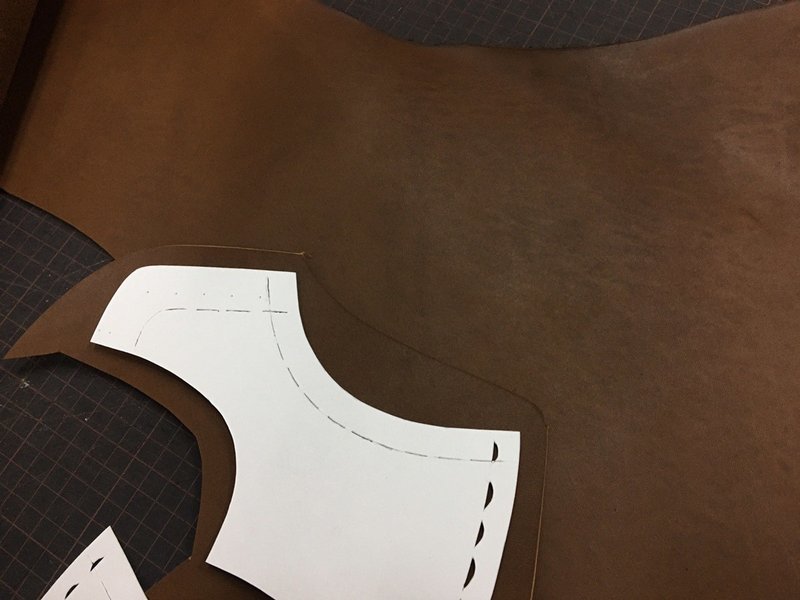
It is best to make a sample using the leather you will use for mass production (different colors are OK).
Have you ever heard that leather stretches and becomes more comfortable? Each type of leather stretches differently. This is related to factors such as hardness, thickness, and tanning method.
If a different leather is used for the final sample, it may look fine at the time of the sample but cause problems when it comes to mass production. It is also necessary to check the gauge of the sole (outsole) and whether there are any defects in the adhesive.
Leather can also be cut with a cutter
This Olfa cutter is sold at home improvement stores and is extremely sharp.
I've always been a cutter. I learned how to do it from my senior. I mainly use a leather knife when handling sole materials (outsoles).
Add reinforcement tape
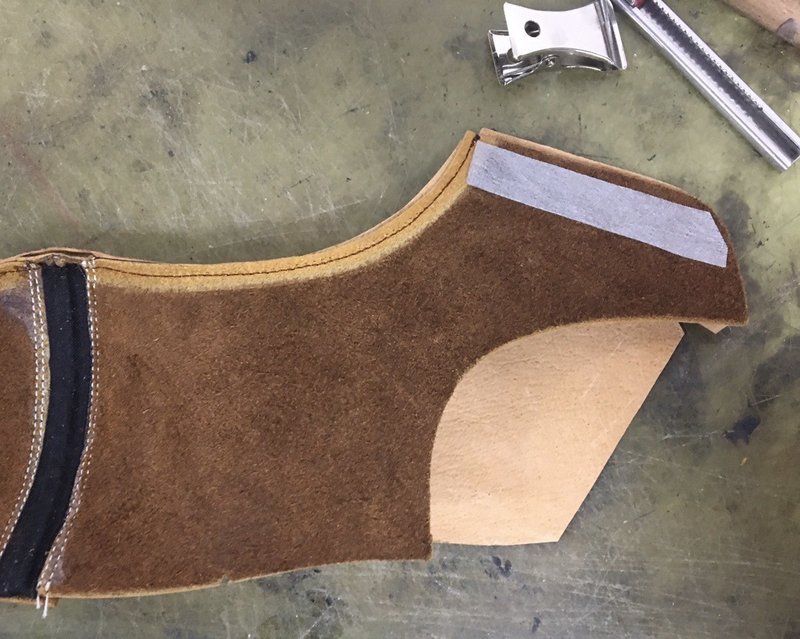
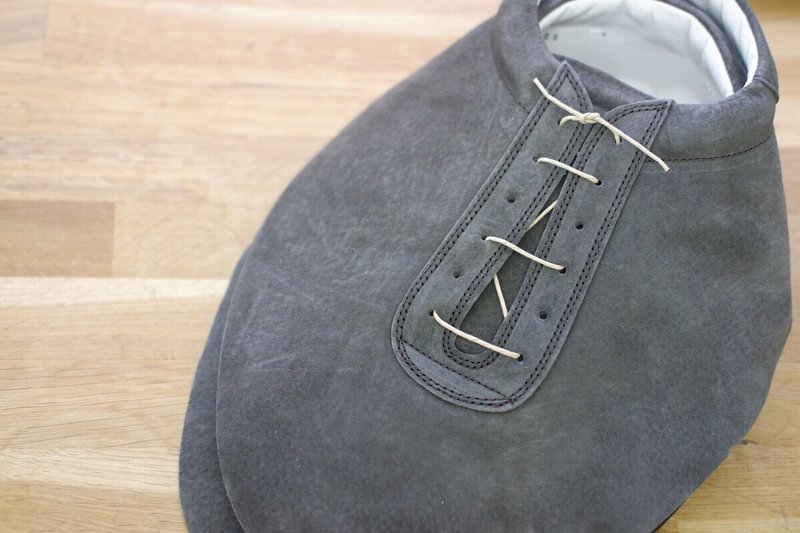
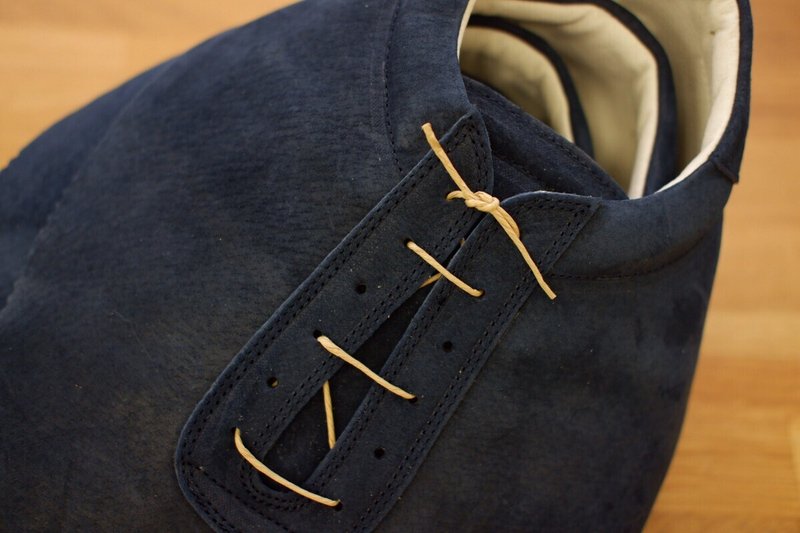
The heel is split, and the holes for the laces are reinforced with tape to prevent them from breaking when the laces are pulled tight after the shoes are made.
Flip the parts in the previous image upside down.
Open the string hole
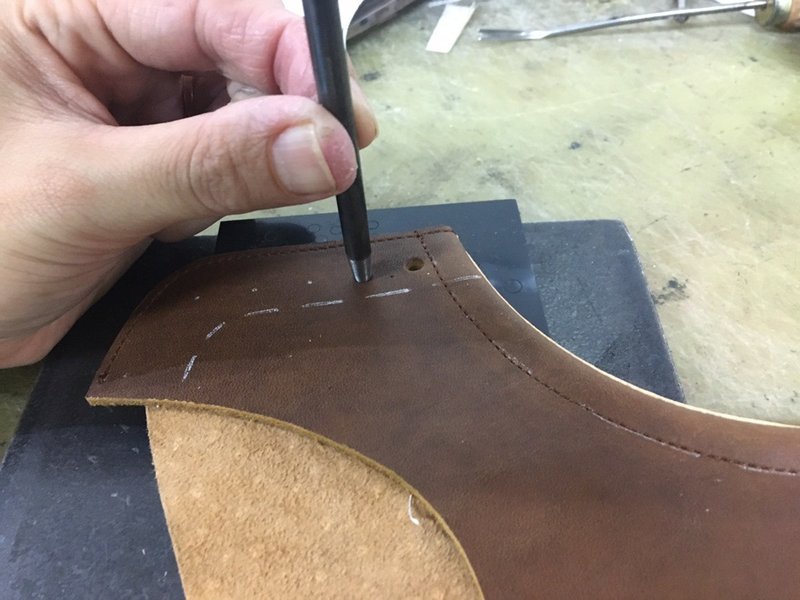
Use a hole punch to make holes for the string. When doing this, make sure that the holes are exactly the same as the pattern.
The finished parts
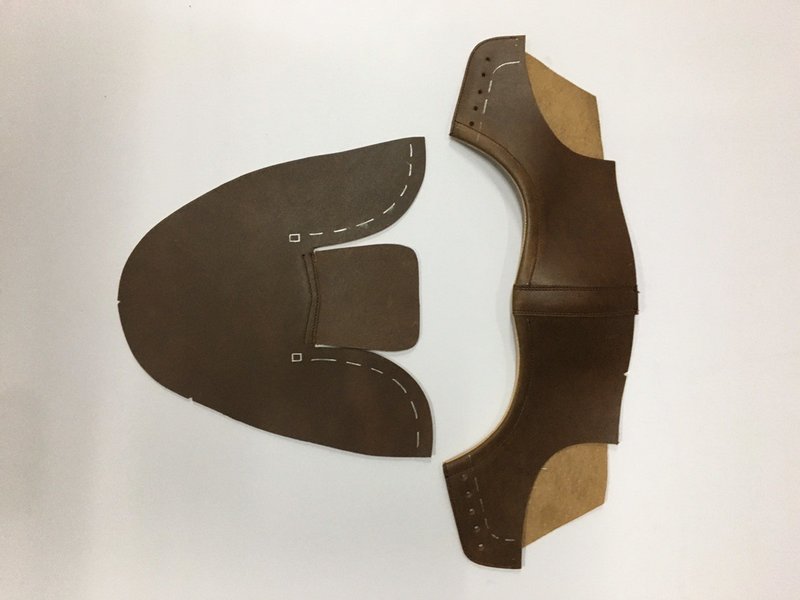
As shown in the photo above, the model called the outer spring has separate front and rear wing parts. They are finally combined.
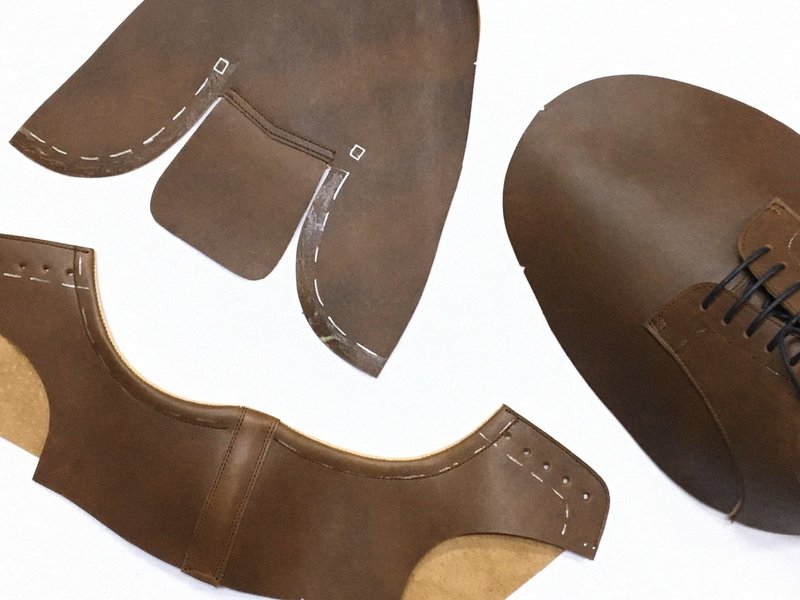
A quick glance. We will check this sample together with the factory, make any fine adjustments, and then prepare for mass production.
<Behind the Scenes ~ Sandals "Fosco2">
Recently, sneaker brand blueover released the tanned sandals "Fosco2."
The blueover website contains product descriptions, but today I would like to talk about the products from the perspective of the maker.
Carefully selected ingredients
The material used for both the upper part that wraps around the foot and the insole that touches the sole is tanned leather. However, each is a different type. We also paid particular attention to matching the colors of the upper and insole. (The photo shows a swatch created to provide instructions to the factory.)
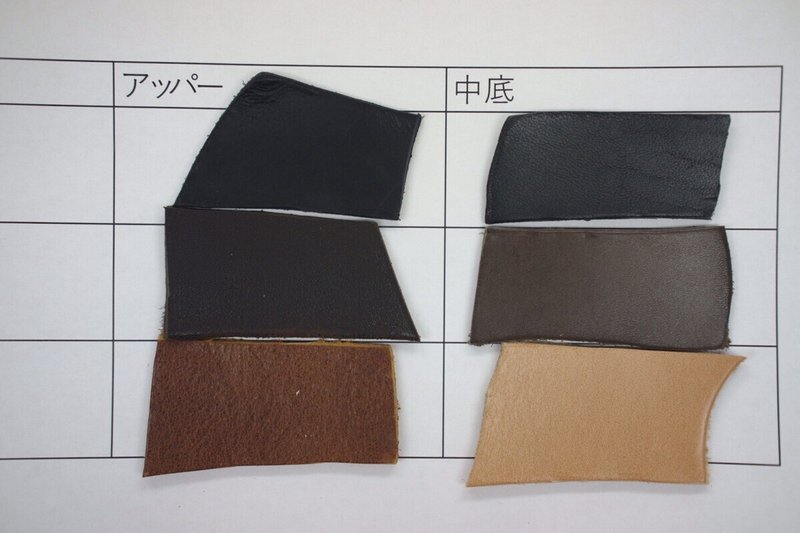
This time, the tanned leather used for the upper was given an additional process of being beaten dry, in order to soften the hardness that is characteristic of tanned leather, by spinning it in a drum (a large wooden barrel like a washing machine).
The leather absorbs sweat from your feet, keeping them cool. At the same time, it changes color and develops a lustrous sheen over time. This is a wonderful perk of wearing tanned leather sandals. Enjoy!
The predecessor model "Fosco" and the new model "Fosco2"
Ten years ago, there was a model called Fosco that was the predecessor to these sandals.
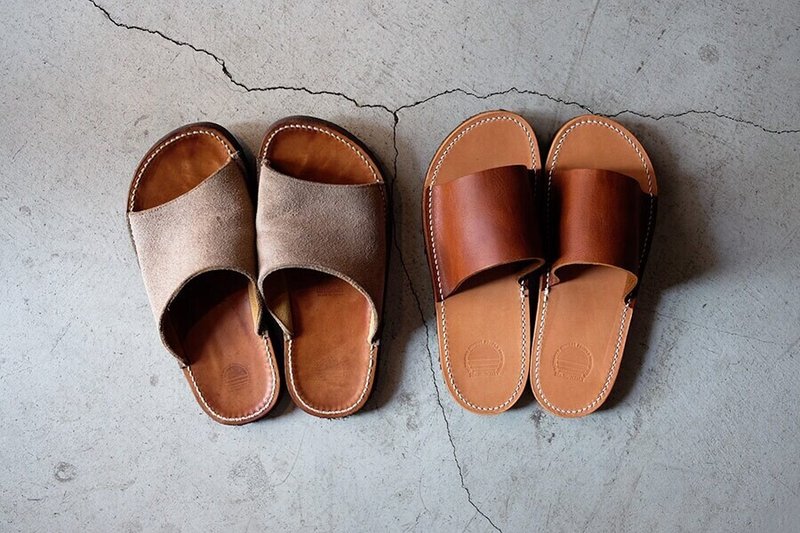
(*The photo on the left is the original "Fosco," and on the right is "Fosco2.")
Even after production of the "Fosco" was discontinued, we continued to hear from Fosco fans. We received some kind words from them saying that Fosco was the only sandal they could wear. However, some people complained that the leather upper part of their foot rubbed against their arch, causing discomfort. Taking these comments into consideration, the "Fosco 2" was born.
Fine adjustment of size
In fact, we created a sample of the Fosco2 and tried it on for nearly two years, letting it sit and rest. We intentionally made it a little tighter for the initial fit.
On the other hand, the first sample was made a little loose, but it didn't hold my feet well and made it difficult to walk in, so the second sample ended up being too tight.
After that, I made several prototypes and tried them on, and finally found the perfect size. The leather of my Fosco2 shoes fits my feet perfectly, and they are incredibly comfortable to wear.
Similarities with the original "Fosco"
We used the same Vibram sponge sheet, part number #8327, as in previous Fosco models.
The branding design was also the same.
Because it's more nostalgic and fun that way.
In the drawstring bag
The Fosco2 will be delivered in a drawstring bag, which will have a tag attached to it that I painstakingly made.
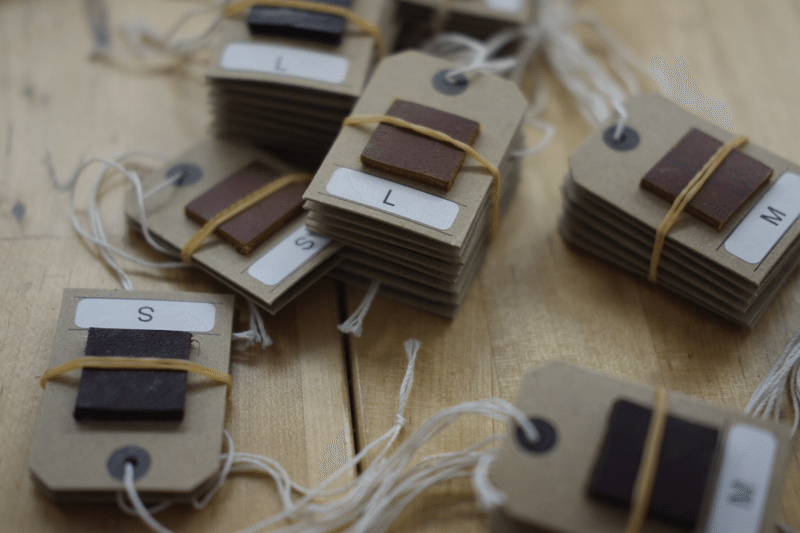
When you pick it up, I would be happy if you look at the tag and think, "Ah, this is it."
It's still hot out. Fosco2 is perfect for a stroll around the neighborhood. Pair it with socks and you can enjoy playing with colors in the fall.
<Make one size up to 29.5cm>
I've been working on a lot of things lately. I'm a little restless and want to tell you all about it, but please look forward to it. One of the things I'm working on is preparing a size 29.5 for Mikey .
Mikey is one of Blueover's signature models. I'll take this opportunity to write about it on Note.
What you need to know when going up or down a size
Going up one size may seem like an easy thing to do at first glance, but it's actually quite difficult, especially when it comes to shoes.
This is because shoes require many different materials and parts, and adjustments to the tools and materials used are often necessary, and there is a lot of division of labor, so we often need to get cooperation from several factories.
What needs to be adjusted
- Wooden mold
- Pattern
- Upper cutting die
- insole
- Insole
- Outsole etc.
There are also other items such as laces, toe caps, and counters that can be used in conjunction with other sizes, but if they cannot be used in conjunction with your current size, you will also need these materials.
Make a sample
First, we decided to make a whole pair of size 29.5 samples to check whether there would be any problems with sizing up. Since the tools and materials are sized up at various factories, we checked to see if any parts were too big or too small when the whole pair was made.
We check to make sure that the manufacturing process is not overloaded.
What we asked the factory
① I asked the die cutter to grade the base pattern.
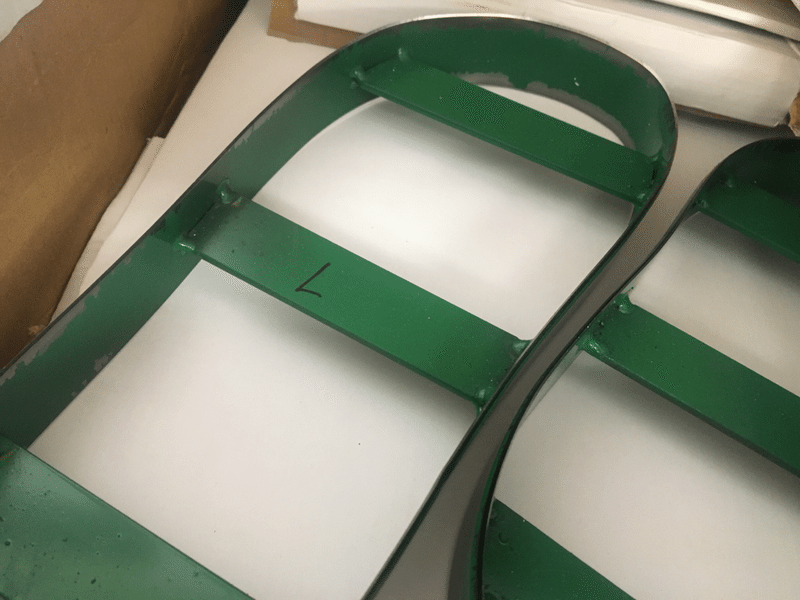
② We asked the shoe tree maker to create a sample of a larger size last. The last sizes we use are 22.5~28.5cm. We were recommended to use the middle size of 25.5cm as a base and increase the size of the last.
3) We ask the sole manufacturer to make a larger size sample. For mass production, EVA or rubber sheets are cut using a die, glued together, and shaped. However, since this is a sample, we have them carve it out by hand, glue it together, and process it.
Currently, ② and ③ have arrived and are waiting for ①. Once ① is completed and arrives, we will have everything ready and can move on to the next step.
<My lazy shoe care method>
Today we'll be talking about shoe care.
If you search the internet for ways to care for your shoes, you'll find a lot of proper methods, so I'd like to share with you how I, a lazy person, do it.
[Frequently seen shoe care methods]
- Brush off dirt with a horsehair brush (black)
- Use the cleaner to remove dirt and any cream that may have been applied during previous shoe care.
- Apply shoe cream to the application brush and spread it evenly over the entire shoe.
If the color of your shoes has faded and you want to add color, you can use colored cream puffs. - Wipe off excess cream with a cloth.
- Add shine with a beige boar bristle brush.
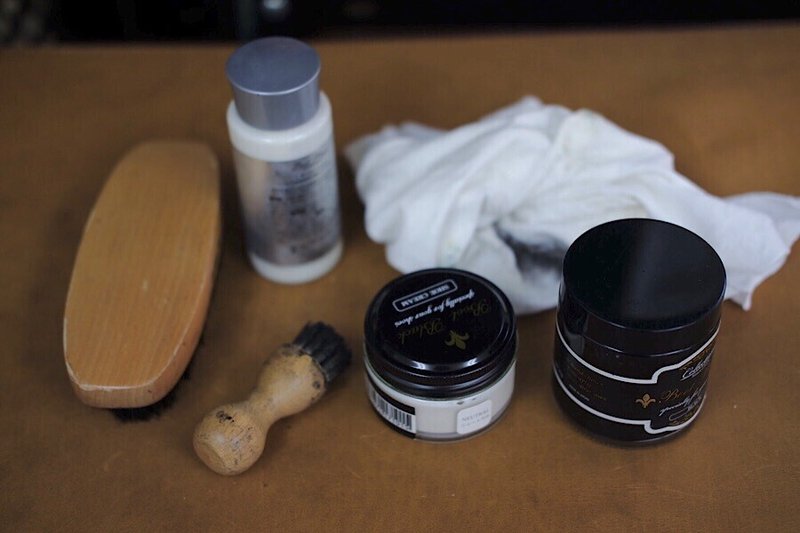
You will need a variety of tools.
Horsehair brush, cleaner, application brush, shoe cream (emulsifying), rags, boar bristle brush...
Actually, this is still a small number. There are so many shoe care products that it would be endless if you tried to add more.
[My shoe care method]
- Wipe off dirt with a rag
- Use the cleaner to remove dirt and any cream that may have been applied during previous shoe care.
- Put shoe cream on a cloth and spread it evenly over the entire shoe.
- Wipe off excess cream with a cloth and move the cloth quickly to create a glossy finish.
I usually just use a rag, but even then it ends up looking like the picture below.
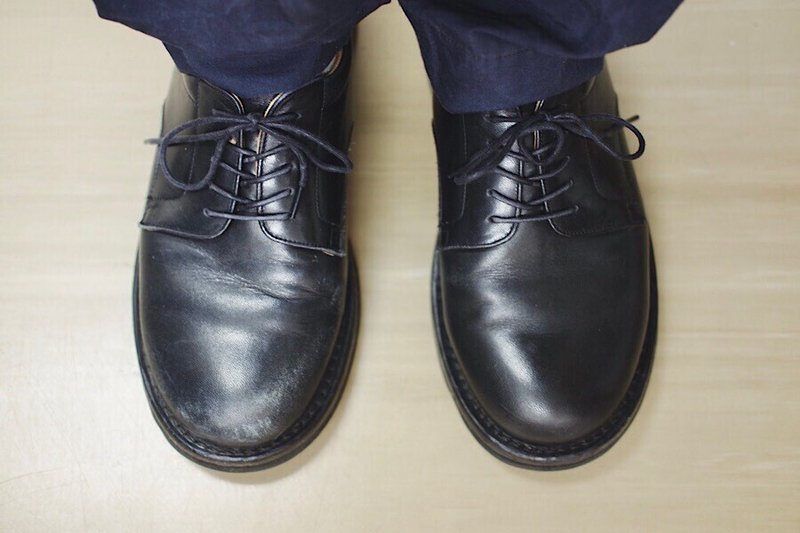
The left is before shoe care, and the right is after. I'm sure I'll get some criticism from those who are more knowledgeable about shoe care, but please give it a try if you'd like.
Just spray some waterproof spray on this and it's perfect!
Two or three colors of shoe polish are enough
Choose an emulsifying shoe cream that is neither too hard nor too soft. It has just the right amount of oil and moisture, so it can nourish and moisturize the leather.
Three shades of shoe cream are enough.
- Neutral colorless cream
- black
- Brown (slightly darker than the shoes I own)
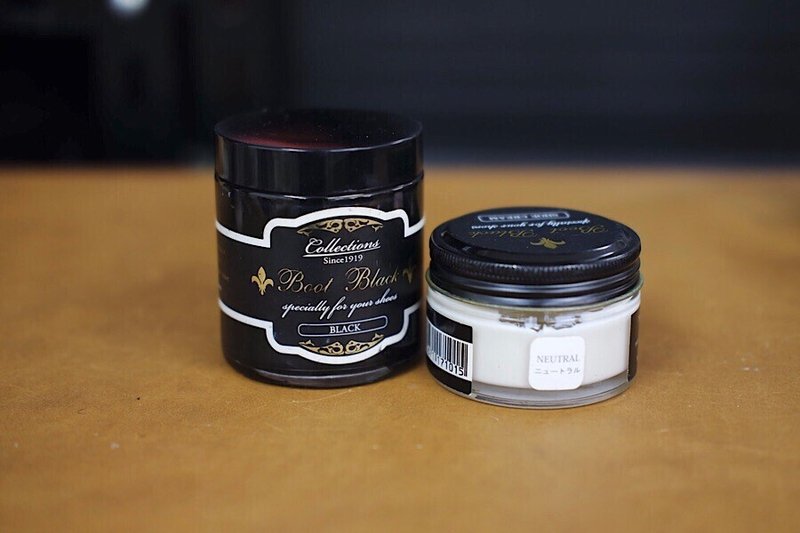
Colored creams come in many colors. However, they are not cheap. A single cream usually costs around 800 or 900 yen, and some creams cost even more. Therefore, the commonly used colors of colorless, black, and brown are sufficient. You can easily get by without brown, but if you can afford it, buy it.
For most shoes, applying a colorless cream will darken the areas that have lost their color.
When painting black shoes, even if you apply the paint and it becomes dark, it may not be enough, so you can add a black cream to fill in the color.
If you have brown shoes and the color is a little darker after applying the colorless cream, but it still isn't dark enough, try applying a brown cream you have. Even if the color of the cream is slightly different from the color of the shoes, once you apply it, it will often blend in and be less noticeable than you'd think.
*To be on the safe side, test on an inconspicuous area such as the arch of your foot before applying.
*Please note that if the leather is tanned or unfinished, the cream may soak in too much and cause stains.
I have bought a lot of colored creams. They are fun to collect and the colors are beautiful, so I have collected a lot of them.
However, if you don't have many opportunities to use it, it will become stiff. That's the sad ending that awaits you.
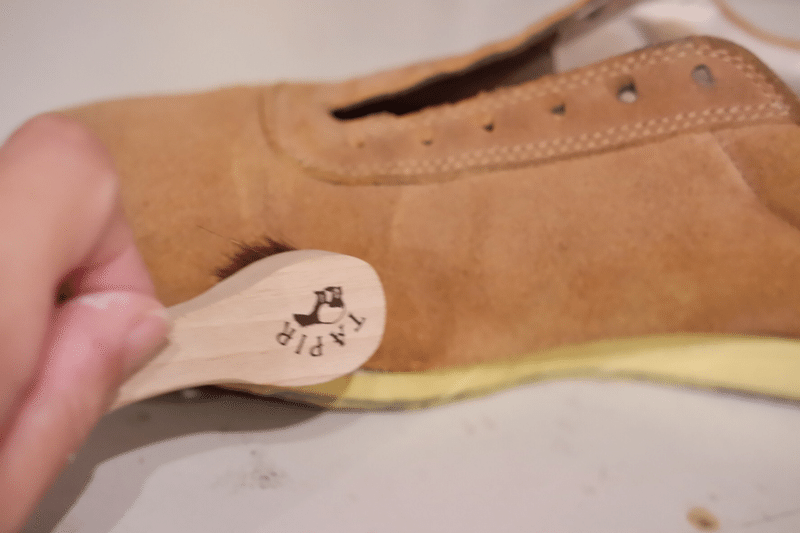
<It's easy to care for velour (brushed leather)>
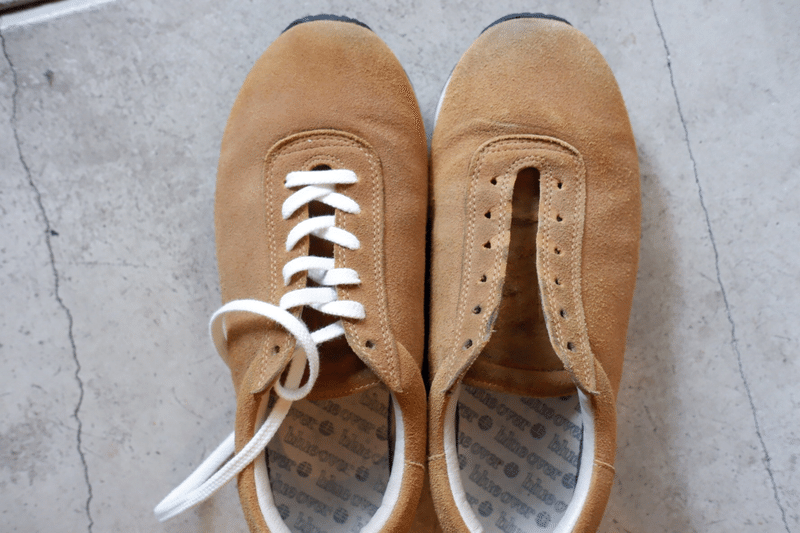
Velour maintenance is not difficult. It's easier than smooth leather. It's the perfect material for someone like me who is lazy.
What you need
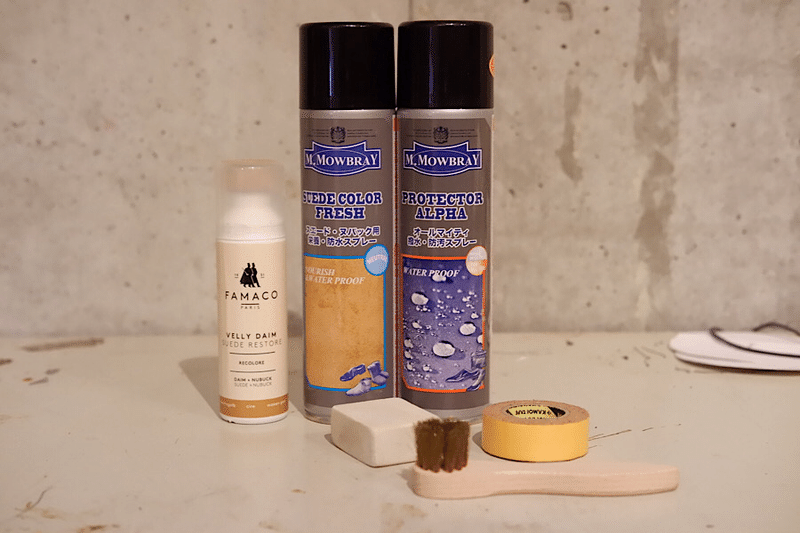
From the front right of the photo
- Wire brush: Removes dust and dirt and smooths the nap of brushed leather.
- Masking tape prevents color from transferring to the sole when color-matching.
- Rubber cleaner for brushed leather. Use it to remove noticeable stains.
From the rear left
- Use a suede color liquid to complement the color of your shoes. There are also spray-on types. Choose a color complement that is close to the color of your shoes.
- Suede care spray: A nourishing spray for suede. Brushed leather is also leather, so it should be treated in the same way as smooth leather.
- Waterproof spray: Any ordinary waterproof spray will do.
procedure
First, remove the string. I don't usually remove it if I'm just doing a quick, lazy treatment, but today I'm also adding a complementary color, so I removed the string.
Remove dirt
Use a wire brush or eraser to remove dust and dirt.
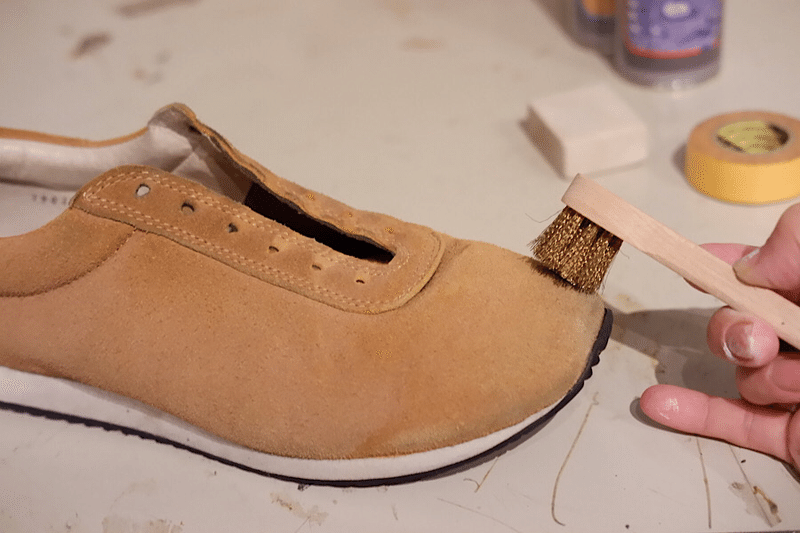
The wire brush will remove the dust trapped between the napped leather.
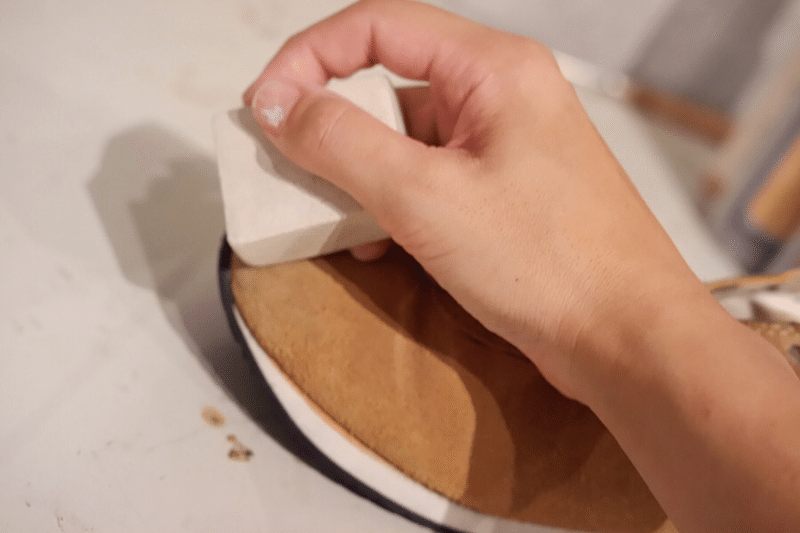
The eraser is used to remove the black stains on the heels of your toes. Dirt gets on your feet when you rub them against asphalt or riding a bicycle. Many erasers contain sand, which acts like sandpaper.
*Please note: Do not rub either of them too hard.
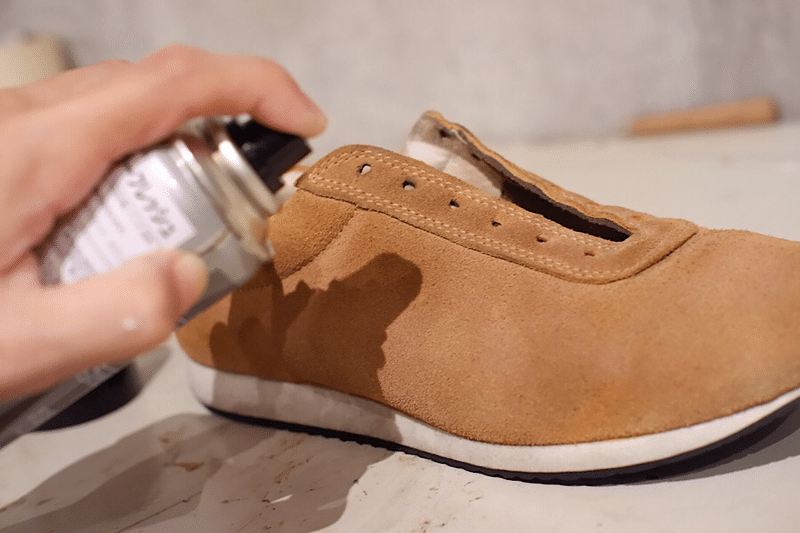
Complementary colors
Use masking tape and color enhancer .
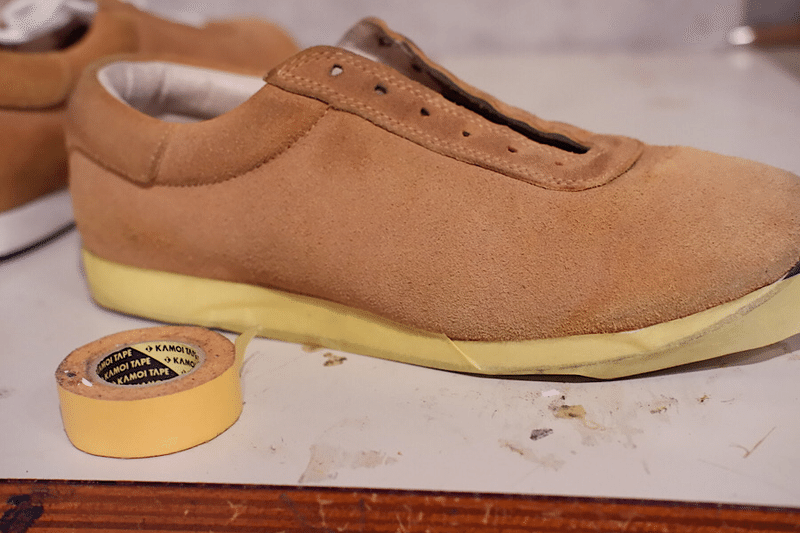
When using complementary colors, use masking tape to prevent the color from transferring to the sole or other parts.
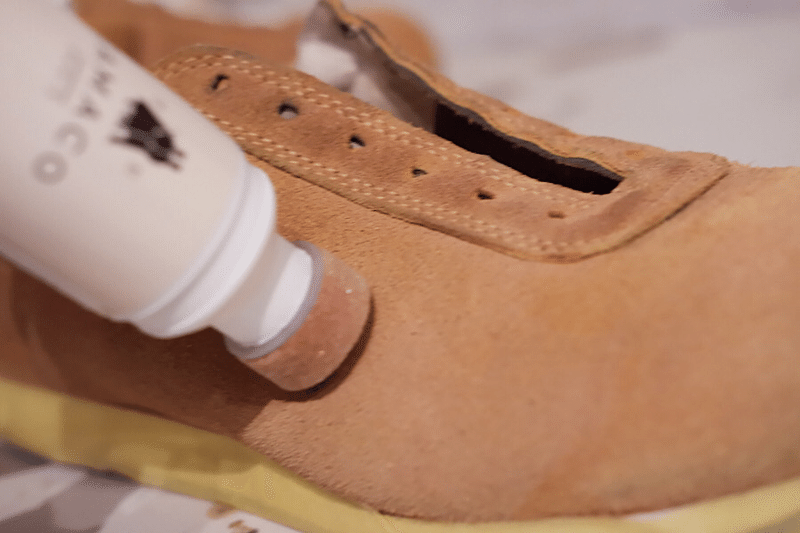
I used a liquid color- correcting agent , but spray-on color is also available. The liquid color corrects areas that have lost color and is less likely to splash onto areas where you want to avoid applying other colors.
*Before applying the complementary color to the entire face, try it on an inconspicuous area such as the arch of the foot. If there are no problems, apply the complementary color to the entire face. If it is thin, you can apply it in layers.
Brushing
Once the complementary colors are done, we will arrange the fur.
Use the same wire brush that you used to remove the dirt. Apply a complementary color and make the fur stand up when it is half dry.
*If the leather is completely dry, it will take a lot of force to raise the fur, which puts a lot of strain on the leather, so it is important to let it dry until it is half dry.
Spray leather care spray
Once the complementary color has completely dried, spray the entire shoe with leather care spray .
The area where you spray will become darker in color. If you only spray it on a small area, it will look like a stain, so spray it all over. Make sure to spray it all over.
*The color will fade once it dries, but will remain darker than before treatment.
Once the leather care spray has completely dried, use a wire brush to straighten the fur in the same direction. Gently. Gently.
Spray with waterproof spray
Once the leather care spray has completely dried, spray on a waterproof spray . Waterproof spray not only protects against rain and other water, but also makes the leather more resistant to dirt.
That's all for maintenance.
Finished product
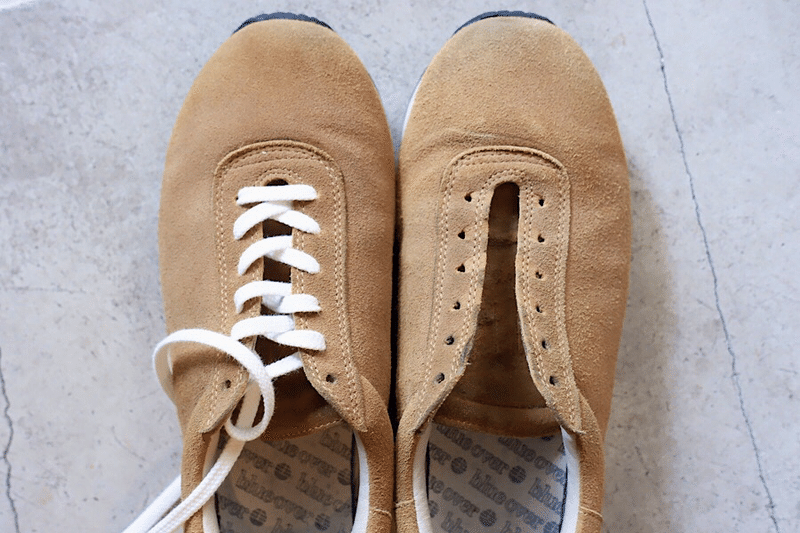
The left is after maintenance, the right is without maintenance.
Can you tell? If you look closely, you can see that the left one has lost its darkening at the toe. The color has also become darker overall.
A side note
Brushed leather does not have the grain surface of smooth leather, so it may seem weaker against water. However, if you take good care of it, brushed leather has a larger surface area, so it seems to have better water resistance. If you take good care of it, you can enjoy it for a long time, and it's not difficult to care for!